Q. I’m ready to harvest my indoor grow. How do I trim and dry my buds?
A. There are a few different ways to chop your buds, but I’ll show you the best way I’ve found to trim and cure.
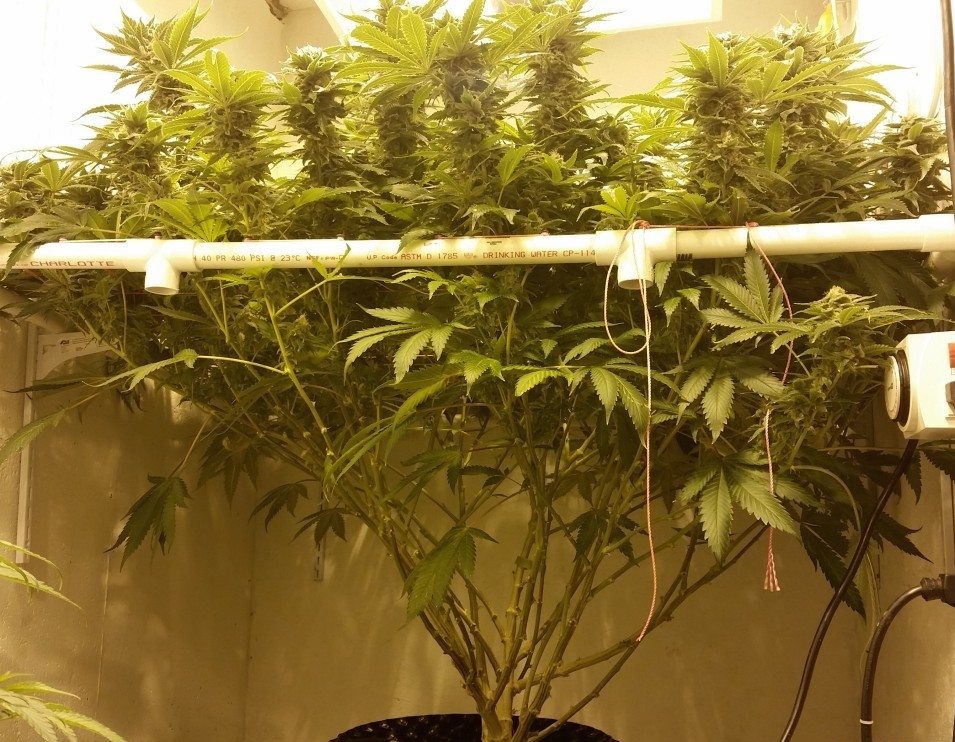
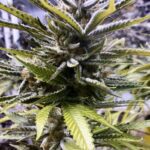
This is a single DinaFem OG Kush in a 44″ x 44″ scrog (trellis).
You planted your seed, you babied it for four months, by now, you have many hours of labor into your pride and joy. Now it’s time to chop it down. All your work could be ruined if this last step isn’t done correctly.
Let’s take a look at the things we will need before we start.
1. A place to hang and dry your harvest. You’ll need a tent or a room that has airflow, odor control, and a humidity of about 60%. The place to hang your bud should be dark or dimly lit. When you hang your harvest, it can be pretty dank, so you’ll need the same odor control you have in the flower room.
2. A good set of shears. A good set of scissors makes all the difference in the world. You’ll also need some wire cutters or heavy duty scissors to cut the thick branches.
3. Vinyl gloves will prevent your hands from getting smelly and sticky.
4. An airtight container to cure and store your cannabis.
Let’s get started:
1. Use your heavy duty scissors or wire cutters to cut your branches. Cut a few branches off the plant, while it’s still in it’s pot. Then get straight to trimming. If you let the branches sit around for too long, the fan leaves wont break off the branch as easily, and leaves get limp and are harder to trim.
NOTE: Some people prefer to hang the entire plant with all leaves attached up to dry, and trim leaves later. The advantage to that method is it slows down the drying process, creating better tasting bud. The disadvantage is it is much more difficult to trim wilted or dried leaves off your bud.
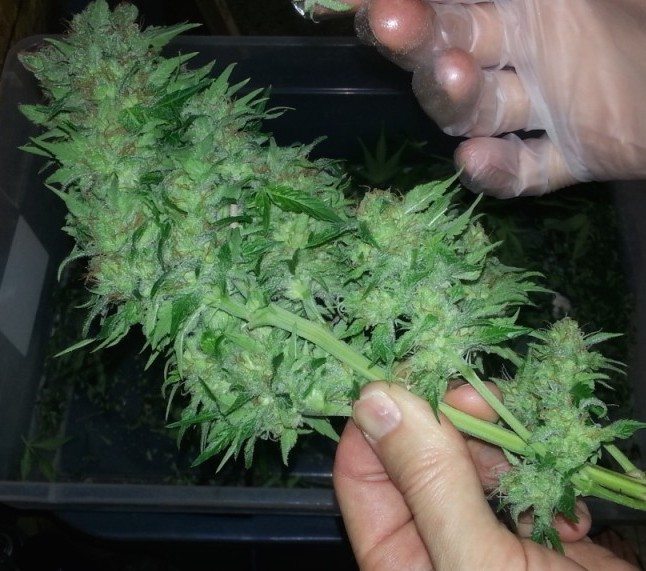
Cutting off a branch
2. Pull out the large fan leaves by hand. Pull each large fan leaf downward with your thumb and index figer, and it will break off easily (as long as the plant is well hydrated). Try to hold it by the branch, not the bud. Keep your hands off your bud as much as possible. This will give you the best looking end result. If the fan leaf doesn’t come out easily, you can use your middle finger to push back on the bud (as you can see in this picture). You will have some fan leaves that have a TINY bit of frost. You can throw them away or keep them. I throw them away.
Pull down on the fan leaves to break them off at the stem.
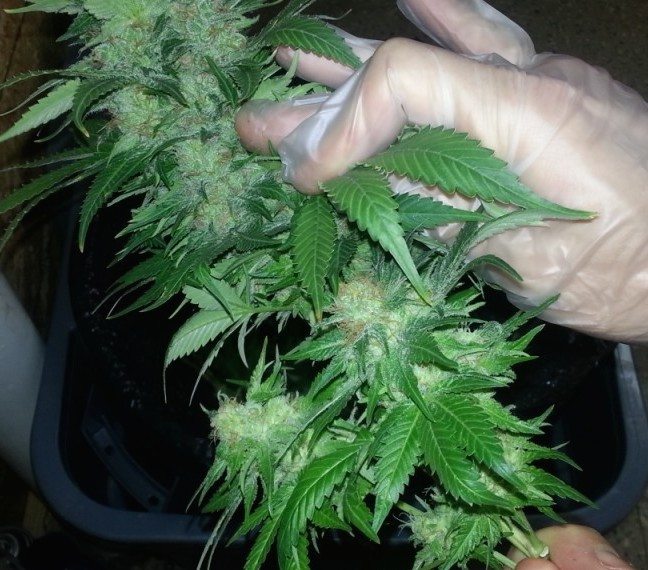
3. Now that all the big fan leaves are off and in the trash can, it’s time to pull off any leaves that have frost on them (aka sugar leaves). We will throw these in our trim container and later we can make BHO, RSO, coconut oil, butter, ice hash, dry ice kief, whatever. Pull off all you the sugar leaves you can. It’s easier to pull them off than to cut them out. The more you can pull out, the better your finished bud will taste, since you won’t be smoking so many leaf stems.
That’s some frosty goodness right here! It’s great medicine so don’t throw it away. At first you may be confused about which tiny leaves to pull out and which ones to trim out. In my opinion, if it is covered with frost, that’s medicine, and you can leave it on. However, leaf stems don’t taste as good as bud, so it’s a trade off. Find a happy medium, and don’t get worry too much.
Pull out the sugar leaves and save them for later use.
In a future article, I’ll show you how to make medicine out of these sugar leaves, including some delicious peanut butter cups:

Peanut Butter Canna Cups
When you’re done pulling out all the smaller frosty fan leaves, your bud should look like this:
Fan Leaves are out and we are ready to trim.
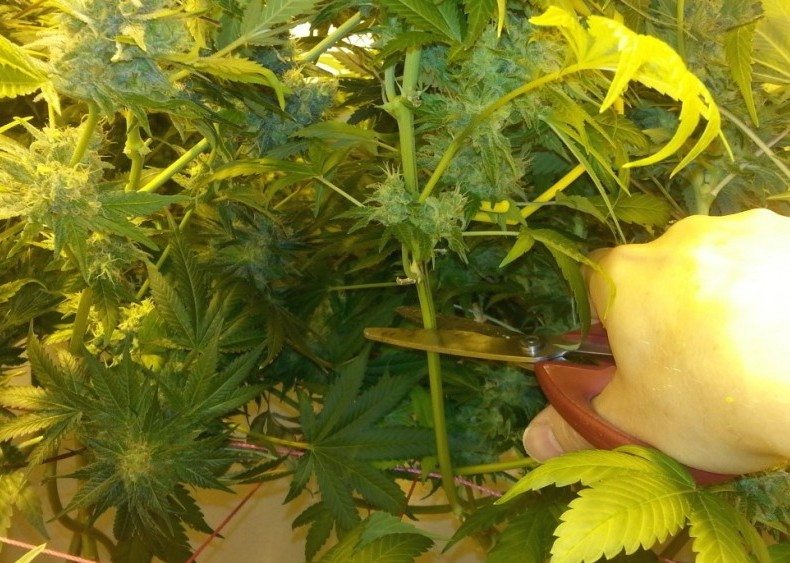
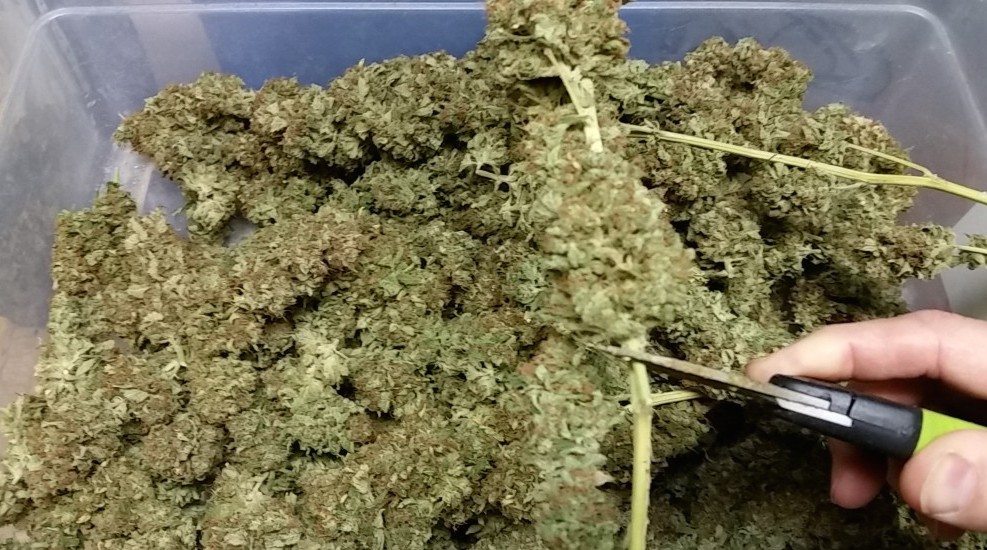
4. It’s time to start trimming with the scissors. Make sure you have a big tote like the one you see above for the trim to fall into. Hold the scissors up to the bud as shown, and start trimming off any leaves coming out of the bud.
Notice I’m holding it by the branch. I close and open the scissors rapidly and turn the leaves into them, rather than moving the scissors around the bud. This part takes some practice. With time, you should be able to trim about 2oz of dried bud, per hour.
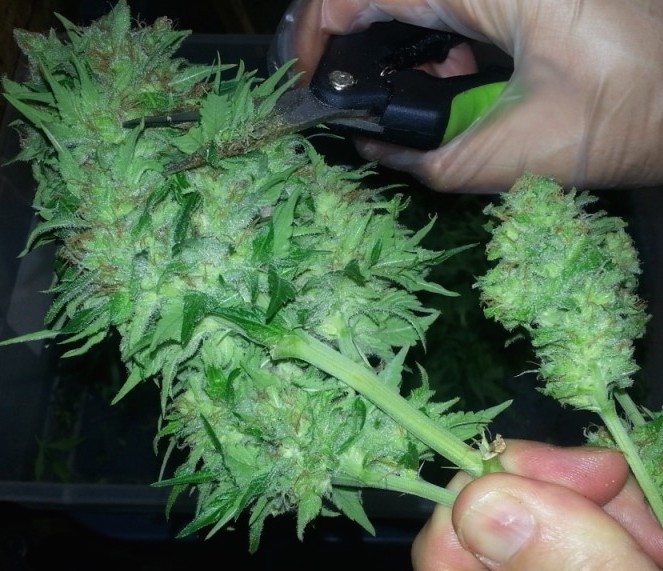
Cutting off all sugar trim.
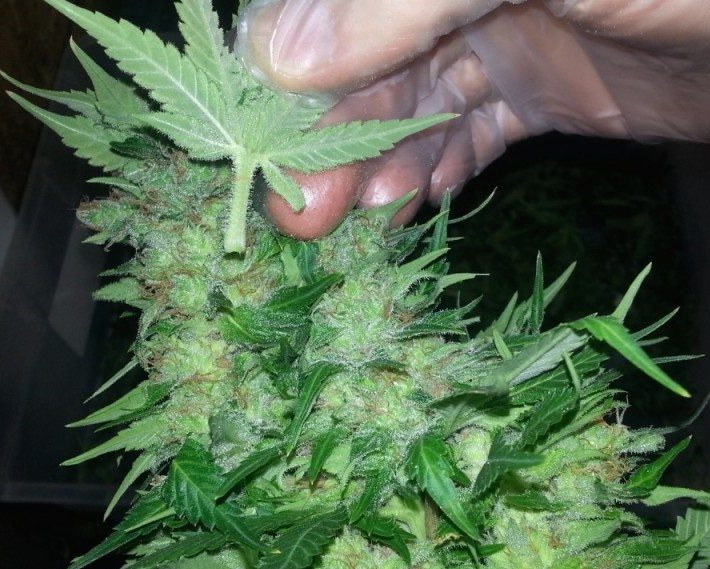
5. Final trim. You can see a few leaves in the middle that didn’t get trimmed well, because they don’t protrude from the bud. If you’re a connoisseur, and want the finest tasting smoke, you’ll need to get in the with the tips of your shears to get to it. If you’re not picky, leave it.
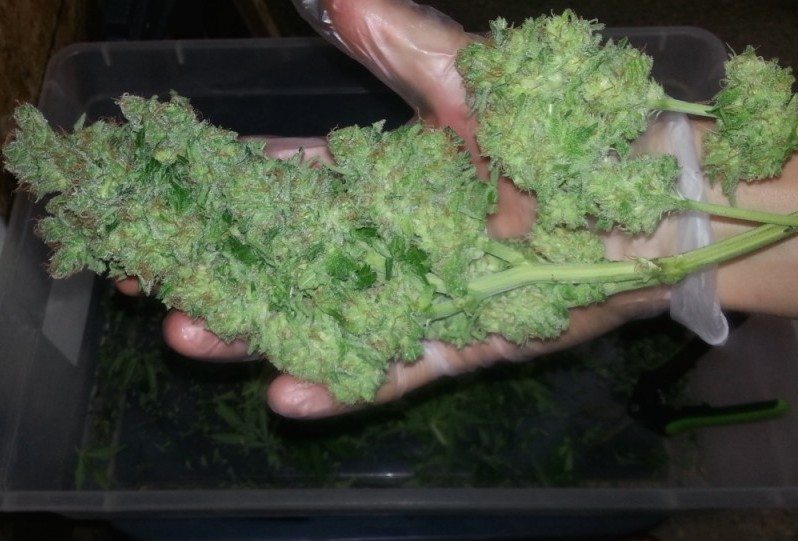
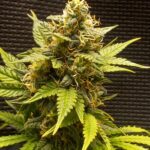
Finished Trimming
IMPORTANT: While trimming, you WILL stink up your house or apartment. Since you’ve been there the entire time, you may not notice how dank the smell is. If you live in an apartment, your neighbors WILL smell it. If you live in a house, you have a little more freedom, but if you get a knock on the door, just opening the door, the visitors will smell it. When you’re done trimming, change your clothes before going out.
6. Hang the branch on a wire hanger and then put it in an area that is odor controlled, and about 60% humidity. I hang from the ceiling in the vegetative growth room. It is ok if the bud gets a little ambient light but no direct light! The buds should hang for about 4 days in 55-65% humidity. A fan should be running in the room, but don’t blow it on on buds, or they may dry too quickly.
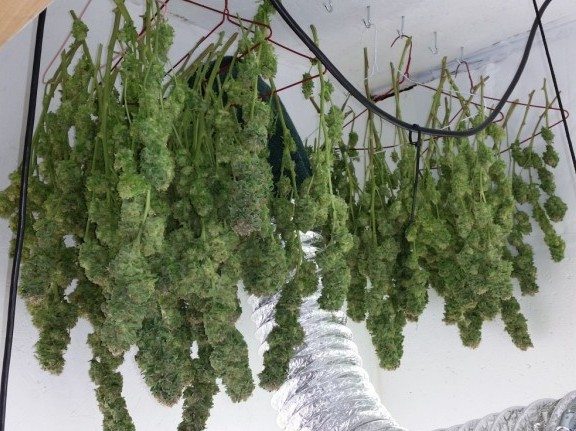
Hanging branches to dry.
NOTE: Some people cut the buds off the branches and / or lay branches in a drying rack. I prefer to hang branches on a wire clothes hanger for a few reasons:
>>>> When the buds are attached to the branch, they dry slower. Slower dry = better tasting smoke.
>>>> If the buds are resting on a drying rack, the weight of the bud tends to make a flat spot on the bud.
>>>> Some medicine is left behind on the drying rack. That wastes medicine, and now you have a dank drying rack you need to store somewhere.
>>>> The best “bag appeal” is achieved when branches are hung, instead of them rolling around in a drying rack.
7. After 4 – 5 days, when we squeeze a bud, it should feel somewhat dry, not wet and spongy. When we bend a branch, it should not be so dry that it snaps, but it should fracture slightly. If we leave them hanging any longer, the outside of the buds will get too crispy. It’s time to take them down. Use your own judgement here.
8. Now it’s time to cut the buds off the branches into our drying container. Use a container that is long and flat, like you see in this picture. Cut the buds off the branches into the container. The buds should be no more than 2″ deep. Put the lid on the container and let it sit for 4 hours. Come back and check your buds.
Cutting the buds off the branches.
After 4-6 hours, you should notice the buds have become spongy. This is because the INSIDE of the bud is more moist than the outside. Keeping them closed up, evens out the moisture thru the entire bud (some people refer to this as “Sweating” the buds). Take the lid off, and let it sit for about 5 hours, or until the buds feel dry again. Be sure the buds are not sitting in direct light, as this may degrade the quality.
Keep repeating this, over and over for 2-3 days, turning the bud over gently. You will know when you are done, when you can’t tell a difference after the lid has been on or off for 6 hours.
IMPORTANT: If you leave the buds in the closed container for too long (before they are completely dry), the buds could mold, wasting your entire harvest. Set an alarm and don’t forget to check it. Error on the side of letting them get too dry, rather than staying too moist.
When you’re done, dried bud should look like this:
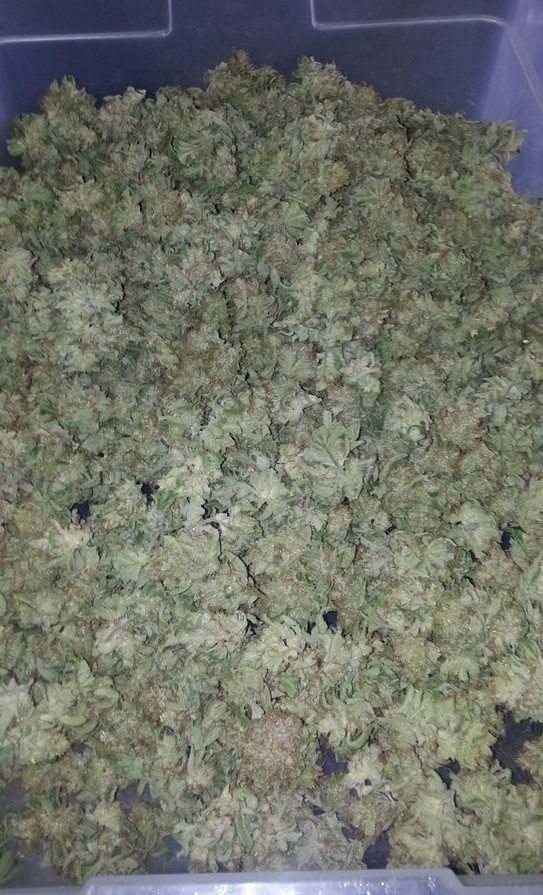
Tray Full of dried bud.
9. Now it is time to put your bud in a glass jar, or other sealed container, such as a “c-vault”. The perfect humidity is around 60-62%. Open the jar (aka “burp”) for 10 minutes, once a day for the next week, and check your buds to make sure they are not spongy or too moist. If you notice they are spongy, they were put in the jar too soon. I cannot stress this point enough. You’ve done all this work, don’t ruin it now, by rushing the drying process.
I use a “Boveda” 62% humidity back in my containers. This is no substitute for “burping” your jars.
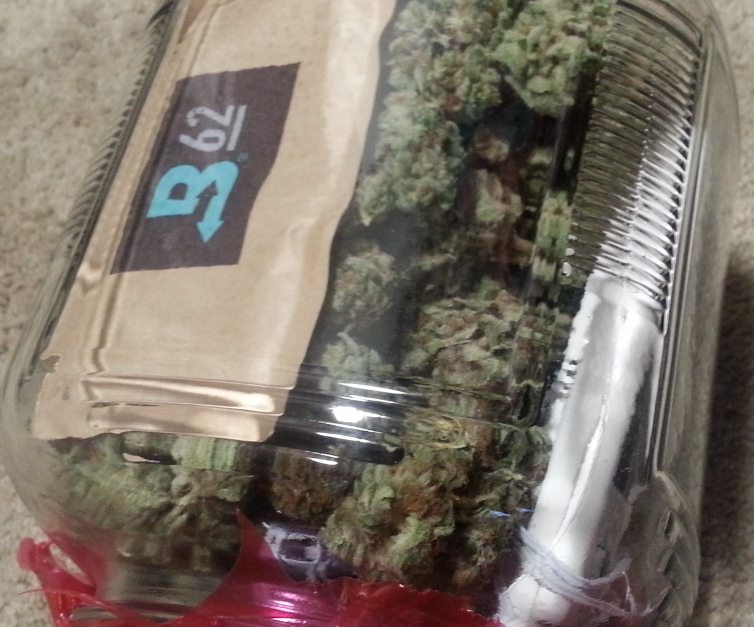
Jar o’ Bud
10. After another week (2 weeks from being cut), your bud is smoke-able. But the taste and potency will get much better after a month or two. This is because of the natual decarboxylation process (the process that turns thca into THC).
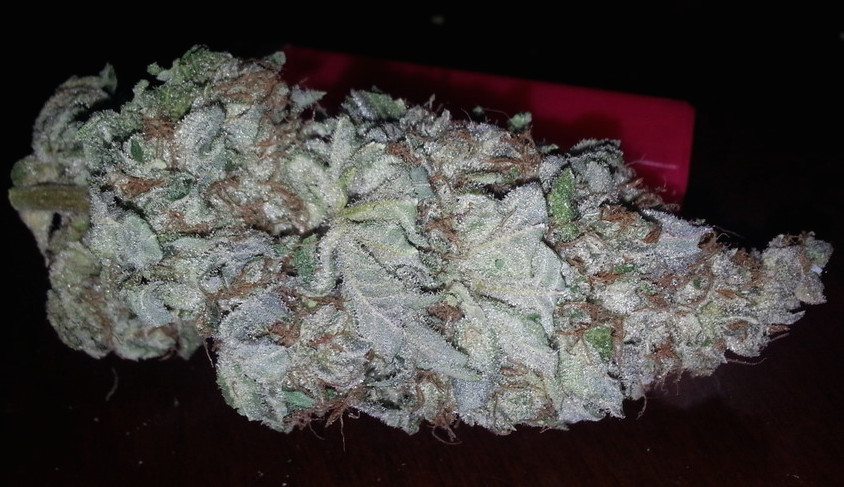
Finished, cured, premium bud.
Enjoy your harvest, and remember, nothing good comes quickly. Take your time with the curing process and you will reap the rewards of great tasting, potent smoke.
Related questions, or comments welcome below.
TheCapn


Great summary Cappy! Colorado’s low humidity (often 20%) poses additional drying/curing challenges. The danger is in letting the buds dry out too fast. The thing that helps is actually adding humidity as you dry, with a humidity controlled environment that you can ratchet down over several days, for example. The Boveda packets are key for the curing stage here. And step 10 is the too often neglected key everywhere, IMHO. But that is the beauty of growin your own. You get to make it just the way YOU like it.
>>>step 10 is the too often neglected key everywhere
Agreed, JD. It’s SO much better if it dries slowly and let cure a couple months. Thanks for your comment.
Great article/advice Capn!
That’s some fine looking, and properly harvested herb!
It’s pretty insane how much cannabis will change in burn quality, taste and ease of rolling once it’s properly cured!
Simple Harvest and Cure (Step By Step) – Harvesting and Processing Marijuana
forum.grasscity.com/harvesting-processing-medical-marijuana/424138-simple-harvest-cure-step-step.html
Sup Capn. Great write up, and of course I learned at least one thing, well 2 things actually. Using a flat tote to spread them out, and the decarboxilation process happening naturally I thought only occurred when the medicine reaches a certain degree (near 200º).
I’ve yet to smoke cured bud, and am on the way to that point with my grow. Question, do you sit on your meds for 2 months to cure before sharing with your patients?
Knew I would come across you sailing the seas again, as always great article I’ve been considering using the boveda packs gonna give them a go with next girls. Looking forward to more great informative articles
While jailbreaking has been declared legal in the U. To recognise a stunning to
bother yourself to use up several from numerous hours via the internet to
watch out for the right along with good computer software.
Swipe Selection (video)Text selection isnt that great on i – OS.
I am a lil confused By What you mean this is no substitute for burping your jars? So you are saying to continue burping jars for1 week for 10 mins everday after adding the boveda pack right? I been growing for awhile but on my first attempt using these pack’s Now
Love it capn!Once again you’ve proven yourself a great teacher.
Cap’n, what temp do you keep your dry room?
>>>Cap’n, what temp do you keep your dry room?
I dry in my flower room, which is 50% – 65% humidity, 77F during the day and 63F at night. It dries quicker than I would like it to, however I don’t have another odor controlled area to dry. That’s another project I need to work on.
Cap’n, I have been taught I need to check to make sure no mold is forming on the buds, but what about keeping the oxygen out of the jars? Dont I keep reintroducing oxygen every time I check on the buds?…advice please. Salute!
>>>Cap’n, I have been taught I need to check to make sure no mold is forming on the buds, but what about keeping the oxygen out of the jars? Dont I keep reintroducing oxygen every time I check on the buds?…advice please. Salute!
Hey Koolaid. After it is dry enough to go into jars, burp your jars every day for a week. Then every few days after that, then once a week. Yes you’ll add oxygen to the jar but that is ok. I use a boveda pack in my cvaults. They really work well, and prevents it from drying out too much for long storage.
Hey Cap’n, quick question, when you first hang them up on hangers you say to keep it at 55-65 humidity but what temperature is best during those 4 days?
This is an old thread but thought I’d chime in on a disclaimer, that I’ve noticed with the boveda packs. I haven’t heard this discussed either so I thought I’d throw it out there in case anyone else stumbles across this awesome tutorial on drying and curing.
Boveda packs work awesome to add moisture back into your Buds, if they get to dry but having a prolonged exposure to the packs robs you of terpenes. I can’t say for sure why or the science behind it, my educated guess is that terpenes are water soluble and the boveda packs will either absorb or add moisture and when it’s absorbing the moisture, it absorbs the terpenes, along with it.
For example, I had a jar of bubblegum, that I was curing, long term, with a boveda and when I went back to it, a few months later, the bud barely smelled anymore and when I grabbed the boveda pack, it reeked of big league chew, when I squished it around a little. Perhaps, in my case, I put the bud in when it was to wet and the boveda pack needed to balance things out, more than necessary but I can’t say for sure. Just a heads up and am wondering if anyone else has experienced this?
Stay stoned.
Great post! Let me also say that for your cannabis plants to grow healthy to maturity you must take proper care of them. You should trim them, prune, and cure before packaging and delivering. The environment where you plant your marijuana should also be air tight with humidity levels of just about 60%. For some growers like it has been pointed out they’d refer to continuous topping during the vegetative growth. Whichever the case every cultivator who wants to realize maximum profits should always be prepared to take proper care of their plants. Also learn many other tricks about the type of plant you are working with, say sativa.
Great post here. Thought I would bump it back up.
I haven’t heard of hanging for only 4 days then finishing the dry in a container before jarring. Interesting…I think I may try this for my upcoming harvest. Trying to hang for 10-14 days without overdrying is tricky…
Well I’ve just finished all the Capn’s posts while I’ve been here at “work” (as people call it) and though I haven’t seen anything new from him since I’ve become a member, I’m thankful the content he left behind.
Peace and Love, Capn!